Top Notes: Five Stash-Busting Gift Toppers That Do the Talking for You
There is a moment, usually around 11pm on a Tuesday in December, when you look at a handmade gift and think: is this a present, or is this evidence? The seams are a bit wonky. The glaze went cloudy. The whole thing is lovely, but it does not exactly shout “I planned this”.
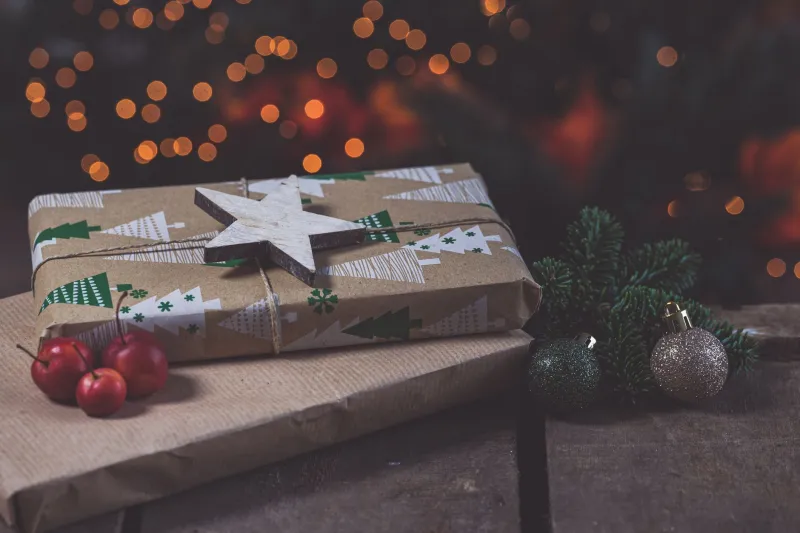
That is where a gift topper earns its keep. Not the main make — the finishing touch. A little paper star, a scrap of ribbon, a tag you stamped yourself. It sits on top of the parcel like a small, confident nod. It says: yes, this was made by hand, and yes, I meant it.
The best toppers are quick, cheap and postage-safe. They use what is already in your stash. They take less time than faffing about with a bow that collapses on the bus. And in the 2026 Christmas run-up, when everything is happening at once, that matters.
Here are five to try.
Why the topping does more work than you think
A handmade gift is already personal. The problem is that the personal bit can look accidental if the wrapping is an afterthought. A topper gives the eye somewhere to land. It creates a little visual pause before the paper comes off.
It also buys you forgiveness. If the knitted hat is slightly too wide or the candle has a dip in the top, a neat tag and a fabric ribbon pull the whole parcel into “considered” territory. You are not hiding the make. You are framing it.
Everything below can be made from scraps, offcuts and things you have been meaning to use up. No special tools. No trip to a craft shop. Just a pair of scissors, a bit of glue and fifteen minutes.
1. Paper stars from old book pages and wrapping offcuts
These are the workhorse of the stash-busting topper world. Cut five or six small strips of paper — roughly 1cm wide and 10cm long — from leftover wrapping paper, old music sheets, a damaged paperback or the inside of an envelope. Fold each strip into a simple loop and glue the ends. Arrange the loops into a star shape on a circle of card, then glue them down.
You can make a batch of ten in the time it takes to watch one Christmas film you have already seen. Use them on their own or punch a hole and thread them onto the ribbon. They weigh almost nothing, which makes them ideal for parcels going through Royal Mail.
If you want them to survive the post, glue rather than tape, and avoid glitter. Glitter is delightful until it is all over the inside of a sorting office.
2. Fabric ribbons from tired clothes and fat-quarter leftovers
A fabric ribbon looks more generous than paper ribbon and costs nothing if you cut it from a shirt that has seen better days. Tear or cut strips about 3cm wide, press them if you can be bothered, then tie them around the parcel in a simple knot rather than a bow. A knot sits flatter for posting and looks pleasingly unfussy.
This is also a good use for those odd strips left over from hemming projects. Pinking shears are nice but not essential. Frayed edges are part of the charm, as long as you trim them neatly.
One caveat: keep the fabric thin. A chunky velvet ribbon is gorgeous on a hamper, less good on a padded envelope.
3. Pom-pom ties for the cosy makes
If you already make pom-poms — or have a small person in your life who makes them at a rate of knots — this one is almost free. Thread a short length of yarn through a small pom-pom, tie it to the parcel ribbon and trim the ends. One pom-pom is enough. Three looks like a craft stall exploded.
They work best on soft gifts: scarves, hot-water-bottle covers, lavender bags, anything that suggests a sofa and a biscuit tin. Use up odds and ends of DK yarn rather than buying a new ball. Mixed colours are fine. In fact, mixed colours are better.
For postage, give the pom-pom a little squeeze test. If it is loosely made and shedding, save it for a hand-delivered gift instead.
4. Stamped tags with a plain brown-paper backing
You do not need a workshop of stamps. One simple stamp — a star, a sprig, a little heart — is plenty. Cut tags from cereal-box card or brown parcel paper, punch a hole, and stamp once in the middle. Write the name on the back in biro. That is it.
This is the topper that makes a parcel look like it came from a small shop rather than a kitchen table. It also solves the “whose present is this?” problem, which is worth more than any decorative bow.
If you are making a batch, stamp ten tags in one go. Leave them to dry while you wrap. A dark ink pad on kraft card is hard to beat, but any colour will do. Just test on a scrap first so you do not end up with a smudged blob where a star should be.
5. Dried-orange labels for a festive finish
Dried orange slices are a classic for a reason. They are cheap, they smell faintly of Christmas, and they make even a plain parcel look like it belongs in a window display. If you dried a batch earlier in the season, you are ahead. If not, a low oven and a few hours will sort you out — though this one is less “fifteen minutes” and more “fifteen minutes plus drying time”.
For the topper itself, tie a small dried slice to the ribbon with twine and add a handwritten label. Use a hole punch on a card tag and thread the twine through both. Keep the slice flat against the parcel so it does not catch on anything in transit.
This is the one to use on gifts you are handing over in person: teacher presents, neighbour gifts, the Boxing Day drop-off. It is also a lovely way to make a jar of homemade marmalade look like it cost three times as much.
The fifteen-minute assembly line
Do not make one topper at a time. That is how you end up with a kitchen table covered in tiny paper offcuts and no actual presents wrapped. Instead, set aside fifteen minutes and make a batch.
Cut all your paper stars first. Then cut ribbons. Then stamp tags. Then tie everything on. Put the leftovers back in the stash box before you start wrapping. A clear surface makes the whole job feel less like a chore and more like the nice bit at the end.
If you are short on time, pick two toppers and repeat them. A paper star and a stamped tag will cover almost every gift on your list. Consistency looks deliberate. Chaos looks like chaos, even when it is handmade chaos.
Postage rules of thumb
A topper should be flat, light and attached firmly. Avoid anything that dangles off the edge of the parcel. Royal Mail does not care about your artistic vision; it cares about whether the parcel fits through the letterbox or the sorting machine.
Use glue rather than tape for paper decorations. Tie ribbons in a knot, not a floppy bow. Keep dried fruit inside the wrapping where it will not get crushed. And if you are posting something fragile, put the topper under a layer of tissue or choose a flat tag instead.
The whole point is that the present arrives looking like you thought about it. A squashed pom-pom does not say that. A neat paper star does.
The last five minutes are not a faff
A handmade gift is never just the object. It is the making, the wrapping, the little bit on top that says “this is for you”. You do not need a dedicated craft room or a drawer full of special supplies to get that finish. You need a scrap of paper, a spare button, a length of yarn and fifteen minutes.
So before you reach for another sheet of wrapping paper, have a rummage through the stash. The topper is probably already in there.